Outdoor Adventures: Create Your Own Teepee
/
I think my love of the outdoors started at my grandparent’s home in upstate NY. It’s hard not to love the outdoors when you have access to 30 acres of country land! Whether we were exploring the woods, camping, gardening or just spending time outside, it made an impression on me. We spent a lot of time gardening, picking ripe raspberries and fresh green beans and then I helped my grandmother prepare and cook the food.
We also loved swimming in the pond and riding the 3-wheeler. One day my grandmother and I were on the 3-wheeler and we saw a baby deer in the woods. It was so precious and just stood and stared at us, with its large, beautiful eyes. Seeing nature up-close like that was amazing.
I also remember finding Indian arrowheads in the ground, learning from my grandmother about animal tracks and learning about the constellations. Because they lived away from the lights of the city, the stars there were brighter than anywhere I have ever seen.
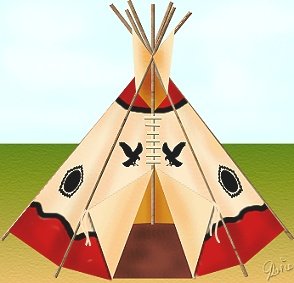
And speaking of Indian arrowheads, I remember building a teepee with my cousins. Here is how to create your own teepee:
1. Preparing the Teepee Cover
o To create a homemade teepee, you'll need to use strong material such as tarp or canvas. Cut the material so that it's roughly twice as long as it is wide (for a 10-foot teepee, it would be 30 feet by 15 feet). Using a knife, shape the material into a semi-circular pattern. On each end, cut a small semi-circle right into the material. When the two ends are brought together, these gaps will create a circular opening to be used as a door.
You'll also want to cut two small, slit-like flaps near the top of the cloth to serve as smoke holes. If you want to decorate your teepee cover, lay it out flat and apply paint as desired. Allow your designs to dry thoroughly before you move on to the next step in making a homemade teepee. Save the remaining scraps of teepee cover material, because you'll use them later to complete the design.
2. Placing the Teepee Poles
o Twelve poles, each 3 feet longer than the width of the teepee cover, will be used to create the teepee. Use smooth, very straight poles, because these will serve as the foundation for your teepee. Secure rope loops to the bottom hem of the teepee cover, making sure the loops are evenly spaced. You will place your poles through these loops to serve as supports. Attach another rope around the top of the poles where they meet the teepee cover.
Use three of the sturdiest poles to form a tripod. Secure the tripod together with rope, slightly higher than the larger grouping of poles. You should have the beginnings of a conical-shaped homemade teepee.
3. Completing the Teepee
o Now that the frame and teepee cover are essentially in place, stake the material down with wooden or metal pegs. First, stretch the material on the frame so that it meets the ground with 2 to 3 inches to spare. Using a mallet or hammer, drive the pegs through the hem of the material. Repeat the process all the way around, stretching the material so that it covers the whole frame.
Get out the scraps of material you saved earlier. Fold two scraps into small pockets, and sew them onto the smoke flaps. Add as much material as necessary to make the area strong. Repeat the process with a single large piece of material to create a cover for the door. Sew one side of the door to the circular opening of the tent. The other side should have a small stick sewn into it, to serve as a peg so you can hold the door flap in place.
I wrote this blog post while participating in the SocialMoms and Clorox2® blogging program, for a gift card worth $40. For more information on how you can participate, click here.