Cute Candy Pencil
/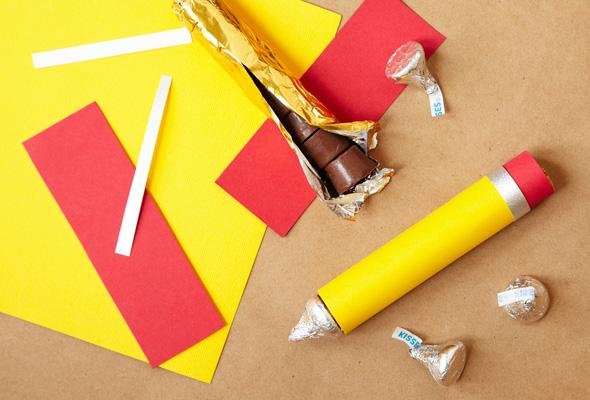
1. Cute Candy Pencil
Materials
Rolled caramel candies
Cardstock — chrome yellow and dark pink
Scissors
Paper cutter (optional)
1-inch circle punch
Craft tape runner
Fine-tip permanent markers — black and blue
Aluminum foil
Tape
Glue stick (extra-strong)
Chocolate candy drop (one per pencil)
Adhesive dots
Instructions
- If using individual candies, tape seven of them together to form a roll. Remove the paper flag from the chocolate drop. Using an adhesive dot, attach the chocolate drop to one end of the roll of rolled caramel candies
- Using a paper cutter, cut a 3 1/2-by-4 1/2-inch piece of yellow cardstock. Cut a 3 1/2-by-1/2-inch strip of pink cardstock. Cut a 3 1/2-by-1/2-inch piece of aluminum foil
- Match the 3 1/2-inch sides of the yellow and pink cardstock pieces together. Attach them to each other using the craft tape runner. Fold the strip of aluminum foil into thirds. Using the craft tape runner, attach the foil strip to the yellow paper, just below the pink strip
- Using either marker, write the back-to-school greeting you desire in the middle of the yellow paper
- Run a line of extra-strong glue along the back of one long side of the yellow cardstock (the attached pink and silver strips will be on the opposite side). Roll the yellow cardstock around the prepared roll of caramel candies, keeping the pink and silver strips on the outside. Hold the paper together until the glue adheres and it is safe to let go
- Create the “eraser” by cutting a 1-inch square from pink cardstock. Using an adhesive dot, attach the pink square to the caramel candy at the pink end of the pencil. Trim the edges to create a circle
- Repeat steps to make as many pencils as desired
Tip: Using the black marker, darken the tip of the chocolate drop to give it the appearance of lead or graphite.