Top 20 Toy List for 2017
/


Grandma's Sugar Cookies
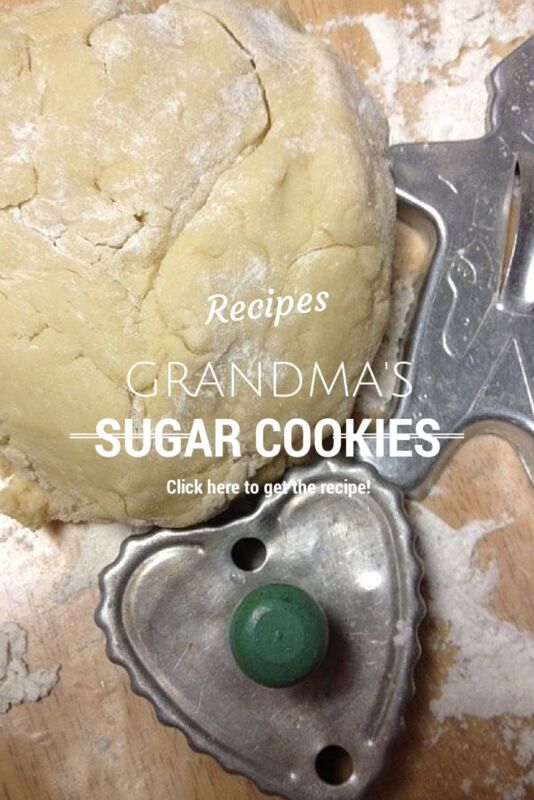
My grandma Esther, who passed away in 2003, was known for her sugar cookies. She also made rum balls, spritz cookies and more. I have started making her sugar cookies with my son Cam!
Here's the recipe:
1 1/2 cups butter, softened
2 cups white sugar
4 eggs
1 teaspoon vanilla extract
5 cups all-purpose flour
2 teaspoons baking powder
1 teaspoon salt
In a large bowl, cream together butter and sugar until smooth. Beat in eggs and vanilla. Stir in the flour, baking powder, and salt. Cover, and chill dough for at least one hour (or overnight). Preheat oven to 400 degrees F (200 degrees C). Roll out dough on floured surface 1/4 to 1/2 inch thick. Cut into shapes with any cookie cutter. Place cookies 1 inch apart on ungreased cookie sheets. Bake 6 to 8 minutes in preheated oven. Cool completely.
And here is her icing recipe, though on these cookies we used a different type of icing. This makes a shiny, drizzly icing that hardens to a shiny finish. It works well with adding food coloring too.
Icing Recipe:
In a small bowl, stir together confectioners' sugar and milk until smooth. Beat in corn syrup and almond extract until icing is smooth and glossy. If icing is too thick, add more corn syrup.
Divide into separate bowls, and add food colorings to each to desired intensity. Dip cookies, or paint them with a brush.
First, I doubled the recipe and mixed everything in my Kitchen Aid mixer. My grandma mixed most of her cookies with a spoon, the old-school way.
Then I wrapped everything in wax paper to chill for a few hours:
Now it's ready to roll! I got out my cookie cutters, including 2 vintage cookie cutters from my grandma. You can find everything you need on ebay for perfect Christmas cookies.
Here's the recipe:
1 1/2 cups butter, softened
2 cups white sugar
4 eggs
1 teaspoon vanilla extract
5 cups all-purpose flour
2 teaspoons baking powder
1 teaspoon salt
In a large bowl, cream together butter and sugar until smooth. Beat in eggs and vanilla. Stir in the flour, baking powder, and salt. Cover, and chill dough for at least one hour (or overnight). Preheat oven to 400 degrees F (200 degrees C). Roll out dough on floured surface 1/4 to 1/2 inch thick. Cut into shapes with any cookie cutter. Place cookies 1 inch apart on ungreased cookie sheets. Bake 6 to 8 minutes in preheated oven. Cool completely.
And here is her icing recipe, though on these cookies we used a different type of icing. This makes a shiny, drizzly icing that hardens to a shiny finish. It works well with adding food coloring too.
Icing Recipe:
- 1 cup confectioners' sugar
- 2 teaspoons milk
- 2 teaspoons light corn syrup
- 1/4 teaspoon almond extract
- assorted food coloring
In a small bowl, stir together confectioners' sugar and milk until smooth. Beat in corn syrup and almond extract until icing is smooth and glossy. If icing is too thick, add more corn syrup.
Divide into separate bowls, and add food colorings to each to desired intensity. Dip cookies, or paint them with a brush.
First, I doubled the recipe and mixed everything in my Kitchen Aid mixer. My grandma mixed most of her cookies with a spoon, the old-school way.
Then I wrapped everything in wax paper to chill for a few hours:
Now it's ready to roll! I got out my cookie cutters, including 2 vintage cookie cutters from my grandma. You can find everything you need on ebay for perfect Christmas cookies.
5 Homemade Hostess Gifts

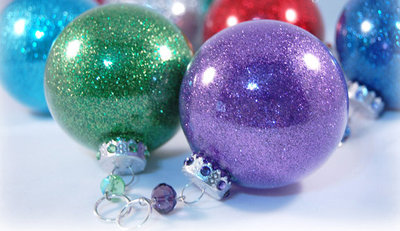
GLITTER ORNAMENTS
Here's what you'll need to make your own glitter ornaments:
Clear glass ornaments
Pledge Tile & Vinyl Floor Finish with Future Shine
Fine glitter (Martha Stewart glitter)
A funnel
A few cotton swabs
To make the ornaments:
1. Take off the hangers from the ornament
2. Squirt some floor wax in the ornament and roll or swirl it around.
3. Take the cap off of the floor shine and stick the ornament upside down on it so the extra drains back in.
4. Pour a generous amount of glitter into the ornament through a funnel.
5. Roll the ornament around so the glitter coats the inside.
6. Put your thumb over the opening and shake the ornament, making sure glitter coats the neck and any other bare spots.
7. Take the lid off of the glitter container and turn the ornament upside down on it so the loose glitter can empty back in the glitter container.
8. Put the toppers back on the ornaments.

HOMEMADE COASTERS
With materials you can find on ebay, make your own hostess gifts!
Cork coasters – Ebay has a great selection
Printed initial – Times New Roman or Georgia.
Transfer paper – craft store
Pencil
Sharpie or permanent marker
1. Lay transfer paper face down on coaster. Center cut out letter on top. Make sure it is straight. Using a pencil make an outline of the letter. The pressure of the pencil point will transfer graphite on the transfer paper to the cork.
2. When you are done, remove letter and transfer paper to reveal a graphite outline of the letter.
3. Fill letter in with a permanent marker.

COCOA PARTY KIT
You will need:
5 mason jars
colorful holiday-colored paper straws
mini-marshmallows
cocoa powder or k-cups (we like Starbucks k-cups)
milk
cinnamon sticks
Customize as you see fit! As you can see here, I added hot chocolate k-cups to one mason jar and mini marshmallows to another.
5 mason jars
colorful holiday-colored paper straws
mini-marshmallows
cocoa powder or k-cups (we like Starbucks k-cups)
milk
cinnamon sticks
Customize as you see fit! As you can see here, I added hot chocolate k-cups to one mason jar and mini marshmallows to another.
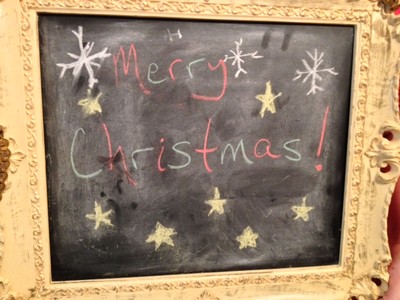
FRAMED CHALKBOARD
Here is how to make this adorable chalkboard frame!
- Take apart a vintage frame (ebay has a great selection) and cut a piece of black board to fit inside (from Home Depot).
- Buy some chalkboard paint at Home Depot.
- To cut the chalkboard, you could use a porter cable multi tool. Then use Liquid Nails to glue the chalkboard into the frame.
- A hot glue gun works well to glue on a piece of felt for the back. If liquid nails gets on the blackboard side it's easy to clean off with a wet cloth if you do it right away.
- For the cord to hang the chalk, upholstery trim works nicely (hot glued only the trim not the chalk so the chalk can be swapped out.
- Make a cute and functional eraser by attaching a piece of felt to a wood block. You can use a round wood block that has a hole in it, covered both ends in felt and wrapped it and hung it with trim (used hot glue gun). Use trim for a decorative hanger at the top (also hot glued).
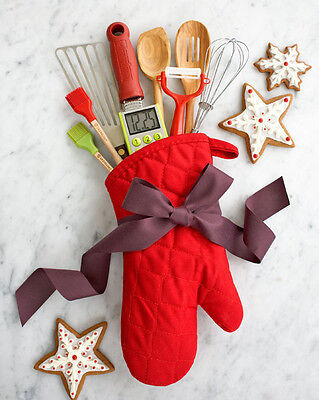
BAKING KIT
This baking kit is a really fun, and quick hostess gift idea.
Simply stock up on any kitchen tools that will fit in a new kitchen potholder and tie with a pretty ribbon! Some ideas:
Simply stock up on any kitchen tools that will fit in a new kitchen potholder and tie with a pretty ribbon! Some ideas:
- spoons
- kitchen timer
- whisk
- peeler
- recipe cards
The Perfect Holiday Cheese Plate

It's that time of year, the holidays. Whether you are attending a party or hosting one yourself, knowing how to make the perfect cheese plate is essential.
Pick a variety: When going the store, ask for a variety of cheeses (cow, goat, and sheep) with different textures. Soft, crumbly goat cheese; oozy brie; semisoft manchego (sheep's milk); aged Dutch gouda; and hard parmesan-reggiano are mild, crowd-winning options. Consider buying at least one pungent and strong cheese, too, like a blue cheese, for serious cheese-lovers.
You can add the following to your cheese plate for some variety: Candied walnuts, Marcona almonds, honey, figs, seasonal fruit (like cherries or grapes), and even caramel go well with cheese.
Serve the cheese plate with thin crackers like Carr's, Raincoast Crisps, or 34 Degrees Crispbreads.
Let the cheese come to room temperature: The complex flavors of cheese taste best when they are served at room temperature. Several hours before guests arrive, take the cheeses out of the fridge, and let them rest on the countertop until they're no longer cool to the touch.
Spread on a cheeseboard: Use a large wooden cutting board or a stone slab to lay out the cheese from mildest to strongest. Between each cheese, place fruits, nuts, and crackers to create dividers. Make sure each cheese has its own knife so that no one double dips into separate cheeses!
Creative Ways to Give Gift Cards
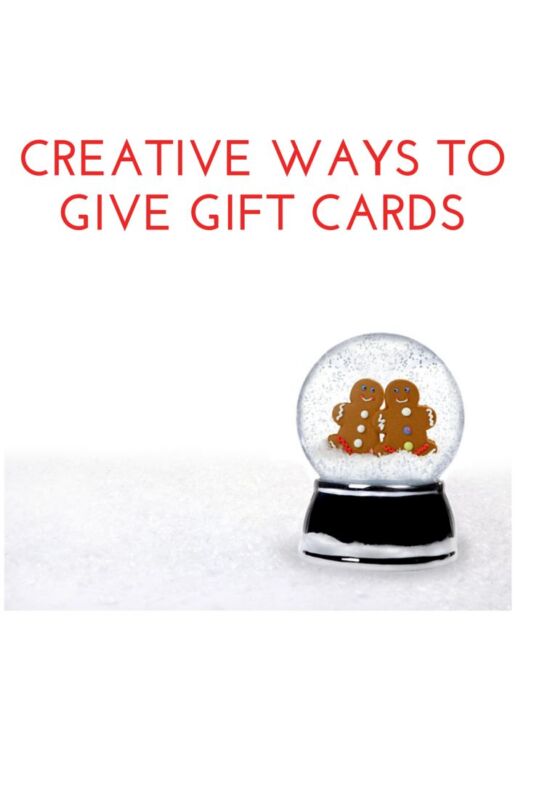
I give gift cards year-round, for all sorts of occasions. Here are my creative tips for gift card giving:
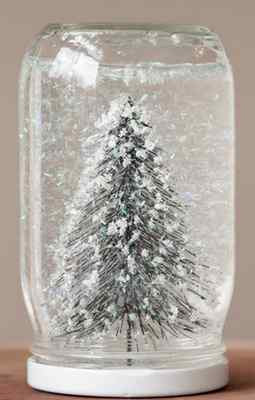
Here is what you need:
Make sure your jars are cleaned and dried thoroughly. With sandpaper, mark up the underside of the lid and then attach your chosen figurines using a bit of epoxy. Epoxy will be the best defense against water over time. Let the epoxy set completely and then fill your jar just short of full with distilled water.
Add a little drop of glycerin to the water. If you add too much it’s going to make the water kind of thick. Add your glitter to the jar, using more or less depending on how snowy you’d like your snow globe to appear. Tinsel glitter works best and gave the best snowy look.
Here is what you need:
- clean jars with lids
- distilled water
- plastic animals
- epoxy
- tinsel glitter
- sand paper
- glycerin
Make sure your jars are cleaned and dried thoroughly. With sandpaper, mark up the underside of the lid and then attach your chosen figurines using a bit of epoxy. Epoxy will be the best defense against water over time. Let the epoxy set completely and then fill your jar just short of full with distilled water.
Add a little drop of glycerin to the water. If you add too much it’s going to make the water kind of thick. Add your glitter to the jar, using more or less depending on how snowy you’d like your snow globe to appear. Tinsel glitter works best and gave the best snowy look.

Last Christmas, I made a New Year’s gift basket for my sister Em and brother in law Jeff. I included a $25 Fandango gift card and a $25 Red Robin gift card (their fave restaurant), along with popcorn and cocoa. It was kind of like an “dinner and a movie” kit

Go with a theme. For example, one year I gave one of my friends a kit of her favorite Starbucks coffees and a mug and included a Starbucks gift card with it. You could also make a chef’s kit, with a Williams Sonoma gift card. The ideas are endless!
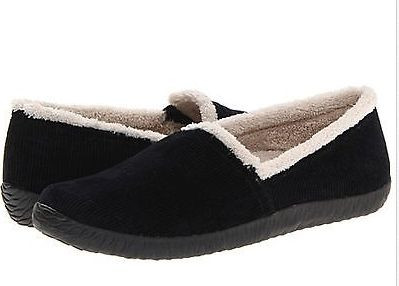
Hide a gift card in a fuzzy pair of slippers. You can also get more creative and hide it in a pair of socks, inside the slippers!
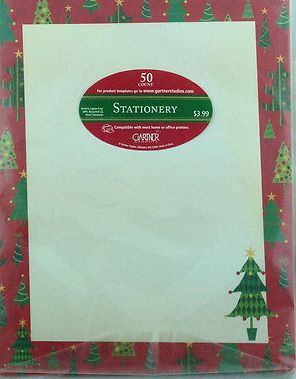
Buy holiday stationary online. Cut, fold, tape and you are done!
Instead of just giving a gift card, attach it to a fun gift, like a book, dvd, box of candy, etc. I like the idea of picking out the recipient's favorite book and matching the candy to it.
Here is a great trick to play on someone. Wrap up the biggest box you can find and put the gift card in the very bottom. They will think they are getting a huge gift, but not understand why the box is so light until they open it!
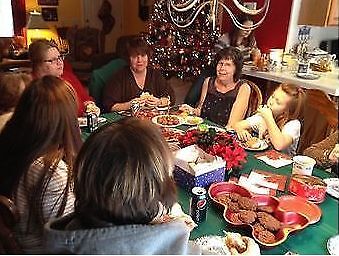
Cookie Exchange Party Tips
For several years now, I have been going to an annual cookie exchange and it’s always a lot of fun! Here are my best tips for having a memorable cookie exchange:

THE BASICS:
Ask each guest to bring a big batch of cookies. You’ll need to estimate 1 dozen multiplied by the total number of guests. We typically have 8 people at our cookie exchange, so that would be 96 cookies.
You may want to provide guidelines to each baker so that you get a good cookie assortment: rolled cookies, bar cookies, drop cookies, decorated cookies. Your friends may have family recipes they wish to share. You can also find tons of recipes online, like on Land o Lakes or Very Best Baking.
You may want to provide guidelines to each baker so that you get a good cookie assortment: rolled cookies, bar cookies, drop cookies, decorated cookies. Your friends may have family recipes they wish to share. You can also find tons of recipes online, like on Land o Lakes or Very Best Baking.

Packaging the Treats:
Each guest should also bring copies of their cookie recipe and containers to take cookies home. Heavy duty plastic freezer bags will work for sturdy cookies, but decorated cookies and more delicate shapes should be packaged in tins or sealable plastic containers. Provide waxed paper or parchment for separating layers of cookies.
Last year, I picked up a few inexpensive bakery boxes to package the cookies. You can find bakery boxes and more cute containers on ebay. And to add extra style to your cookies with these adorable gift tags.
INCLUDE EXTRAS:
Buy reusable tote bags and include Yankee candles, along with the cookies. When I did this last year, everyone loved getting a little something extra. You could also include an assortment of candy, stickers or another small treat.
TIPS FOR THE HOSTESS:
Before the guests arrive, put on some holiday music and light a seasonal scented candle or spray a little holiday room. This will put guests in a holiday mood!
Besides snacking on cookies, set out big bowls of popcorn and chips, the veggies and dip and an insulated server of hot chocolate and a pitcher of cider for all the cookie bakers to help themselves.
Besides snacking on cookies, set out big bowls of popcorn and chips, the veggies and dip and an insulated server of hot chocolate and a pitcher of cider for all the cookie bakers to help themselves.
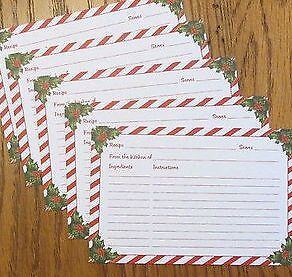
COOKIE RECIPE BOOKLETS:
Ask your guests to mail (or e-mail) their cookie recipes to you, or collect the recipes on the day of the party. Compile the recipes into a booklet for everyone to take home! Recipe booklets can be made in Microsoft Word or if you want to do something fancier, you can create a cookbook online. Or they can write them out on recipe cards.
HELP OTHERS:
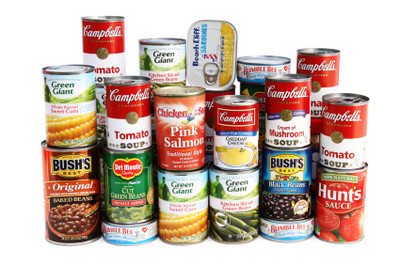
Have guests to bring an unopened package of store-bought cookies or canned food. You can then collect the packaged food and bring them to a homeless shelter or food pantry. We also like to make extra plates of cookies for elderly relatives who couldn’t be at the party and we drop them off later.
Free Regal Holiday Movies

Holiday Movie Schedule:
- 11/26 – Polar Express
- 12/03 – A Christmas Story
- 12/10 – Christmas Vacation
- 12/17 – Home Alone
- 12/24 – It’s a Wonderful Life
Every Saturday through December 24th, Regal Theatres will be showing a classic holiday film at 12PM and admission is ONLY $5! Plus, if you’re a Regal Crown Club member (sign up here if not), you’ll can score a medium popcorn/medium soft drink combo offer for just $5 – limit one combo per transaction with your Regal Card.
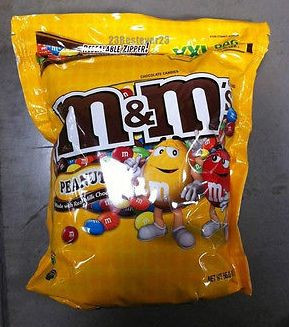
M&M Holiday Wreath

You Need:
- green m&ms (and a few red for berries)
- rice krispie treats
- vanilla frosting
- green food coloring
Prepare rice krispies accoring to directions. Shape into a wreath and let cool. Mix a few drops of food coloring into vanilla frosting until desired green color. Add on M&M's before frosting hardens. Add a bow, done!


